
BAKING MEMORIES
When I was a wee bairn living in Queens, my great-aunt Katie lived in Flatbush, and not far from her was a baker that made excellent semolina bread. Aunt Katie is in a home now, and I have no idea if that baker’s still around, but I still remember the bread, and I still have a soft spot for semolina bread. Since I have all this sourdough starter lying around, I figured I’d try my hand at it.
I’ve been making sourdough once a week for a little while now, and I’ve been pretty happy with the results, so I thought I’d branch out a bit. I took a bunch of books out of the library and read some posts on the Internet and dove in.
The starter has been sitting out on the counter all this time, and I feed it every day. (I’ve been feeding it the same King Arthur bread flour that I’ve usually used for baking it, and I’m debating getting a less expensive flour for the daily maintenance.) I fed it last night so it was ripe this morning, and set it into a bowl with semolina flour, bread flour, and filtered water.
Right away, the dough felt different. It wasn’t gummy like the regular loaf I make; it came together pretty quickly and easily. I still don’t have a good bowl, so I used the bowl from my old rice cooker. I also don’t have a working stand mixer, so I kneaded it by hand. The skills I learned in massage school came in handy when kneading the bread, especially since I kneaded it for about 25 minutes total and that’s a lot of work. (The funny thing is that while the bread was rising, a friend of mine came over and I gave her an actual massage, so I got twice as much practice in!)
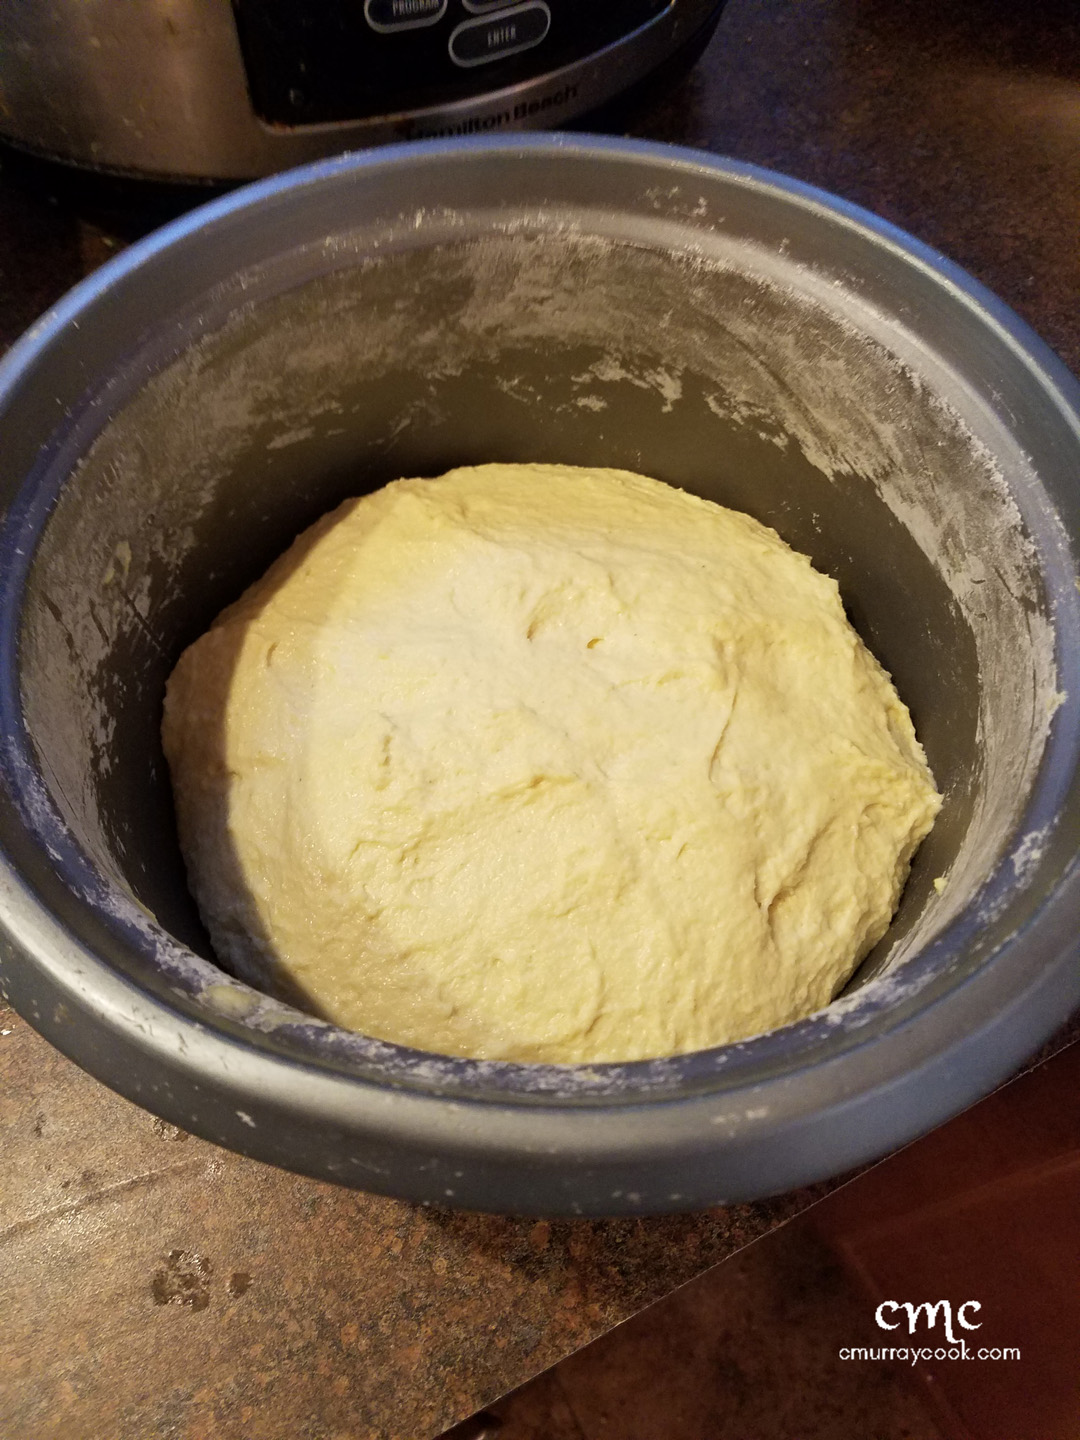
After the second rest, the dough came together nicely. It was still a little tacky, but it wasn’t really leaving any residue on my hands. I didn’t add any additional flour. It didn’t really rise dramatically, though, and I wonder how much of that was the semolina flour and how much of it was all the gluten I developed by kneading the bread so long. I’m still learning how bread behaves.

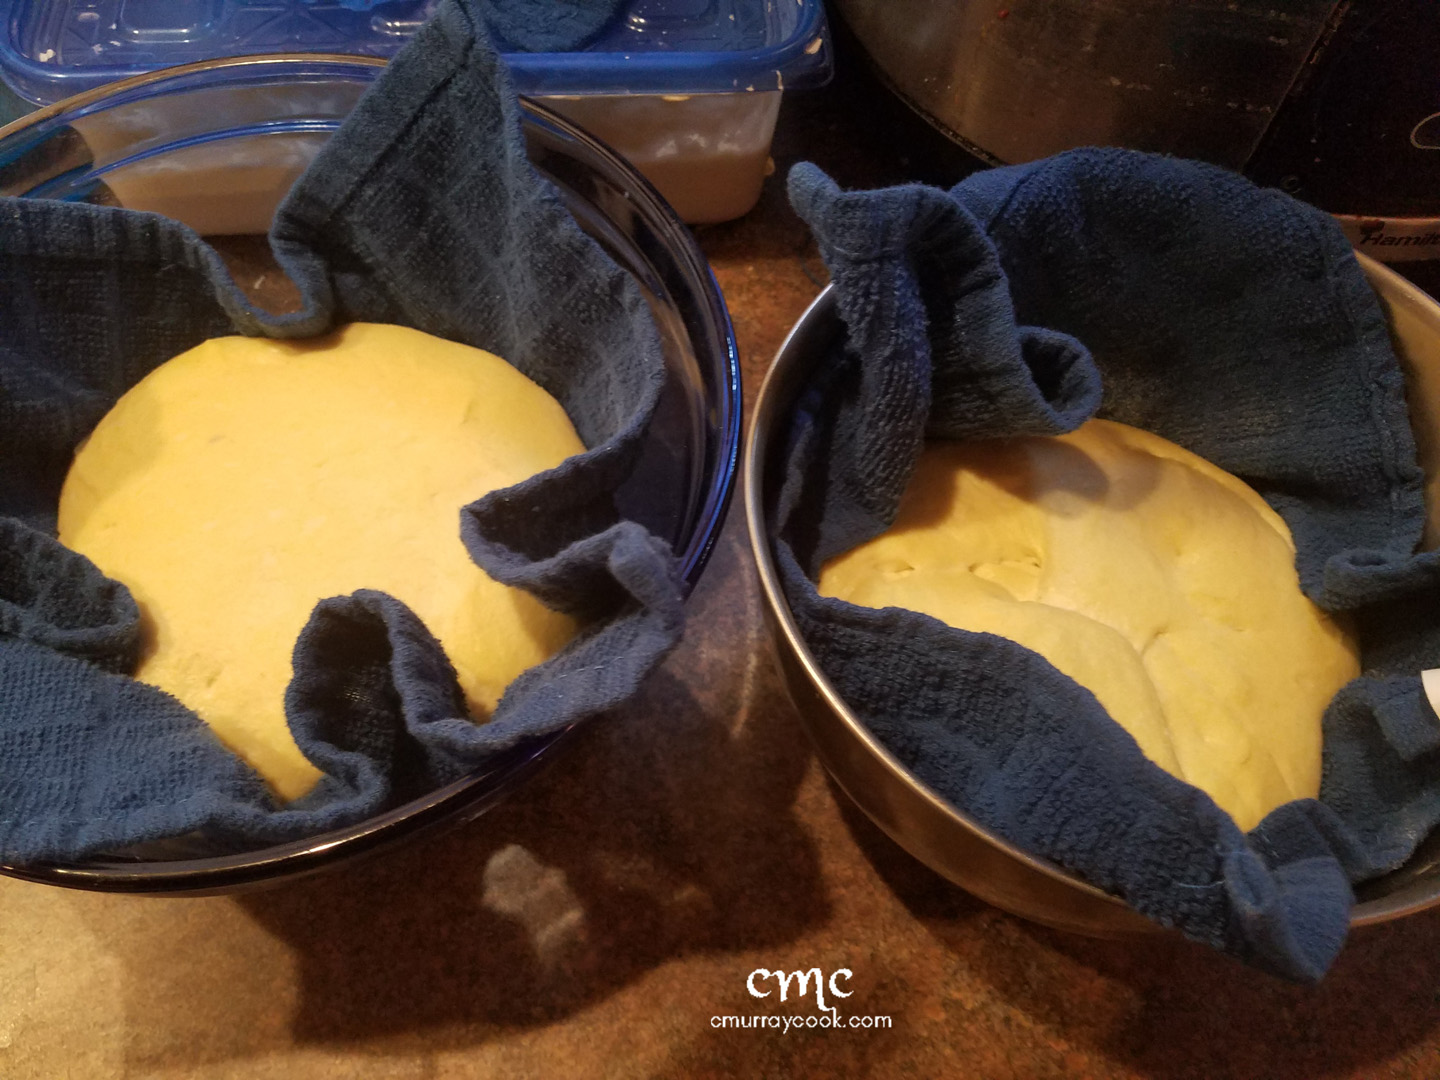
I punched it down after an hour — as mentioned, it didn’t really rise much, so “punching it down” is kind of a strong term for what I did, which was more “kinda pushed it around in the bowl for a couple of minutes”. I let it sit for another couple of hours and then divided it into two loaves. I don’t really have the equipment to make the batards I grew up with, so boules it was.
During the proofing in and out of the refrigerator (see the recipe below), I gave the aforementioned massage and then preheated the oven to 500 with a pan of water on the second rack. When the bread was ready to go, I flopped the loaves onto greased baking sheets, slashed the tops, doused them with a mixture of cornstarch and water, and sprinkled sesame seeds liberally on the top. Into the oven they went, and I dropped the temperature immediately to 450. I wasn’t happy with how they looked after 25 minutes, so they ended up going in for about 32 all told. In the oven, at least, they rose dramatically.
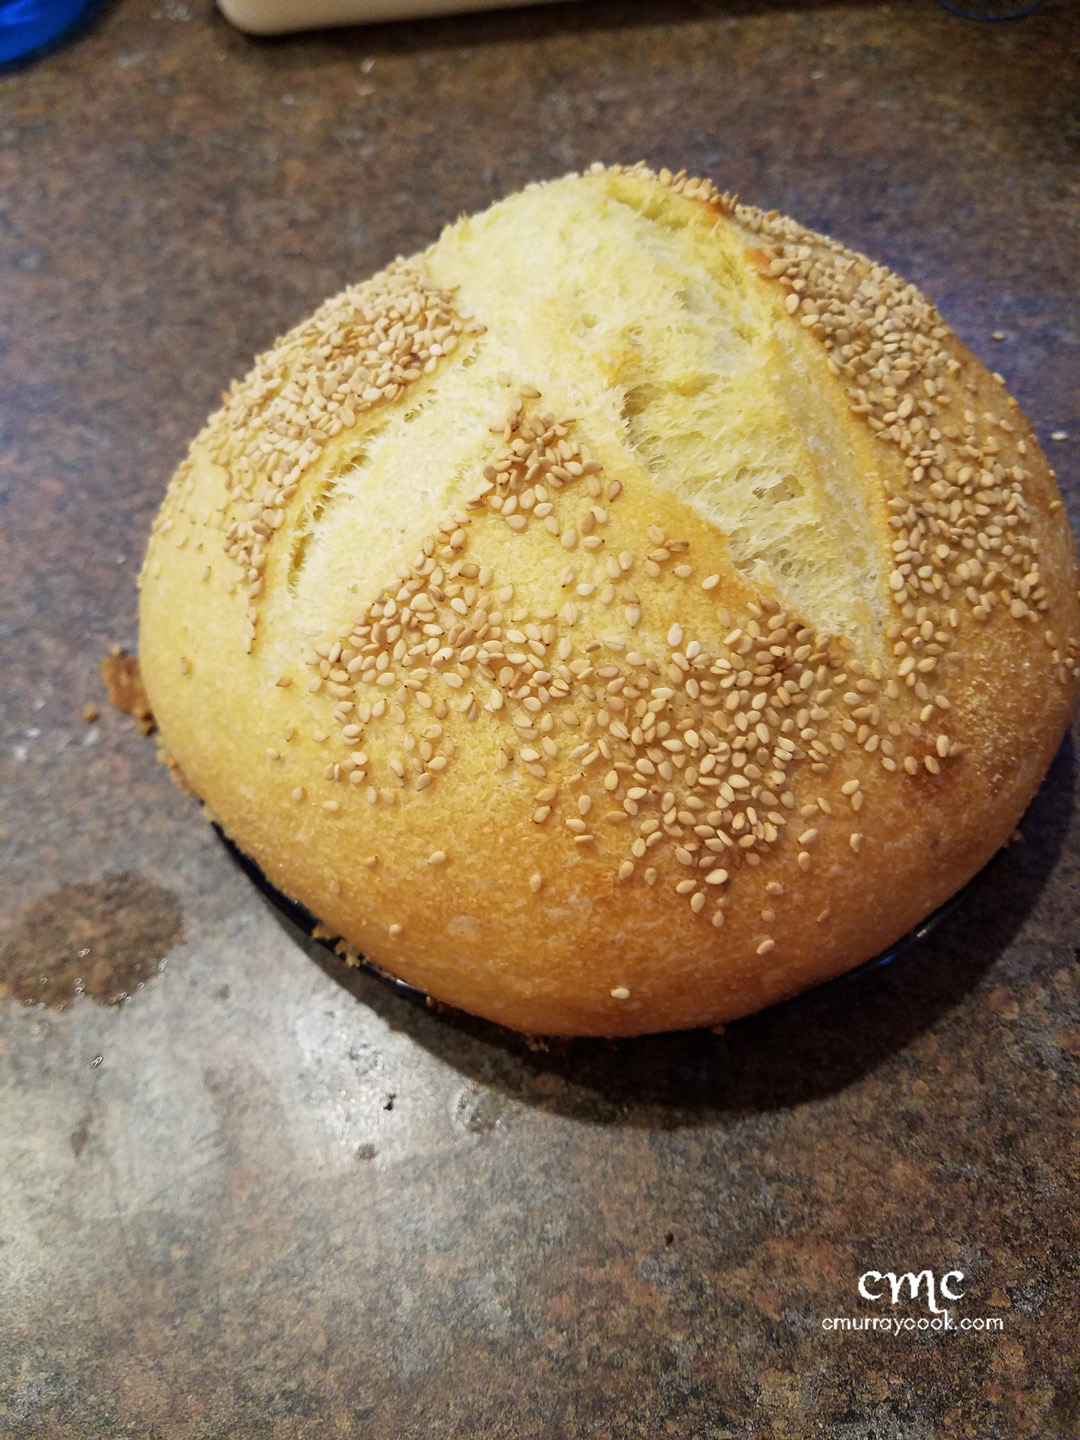
My friend and I couldn’t wait, and we tore into one of the loaves, burning our hands slightly, but it was so worth it. It was definitely more semolina-sweet than sour, so maybe next time I will let it rest in the fridge even longer. It was, however, delicious. Definitely a successful experiment.
RECIPE
- 300 g ripe sourdough starter
- 550 g semolina flour (see Notes)
- 125 g bread flour
- 400 g filtered water
- 20 g kosher salt
- 2.5 g cornstarch
- 60 g more filtered water
- Sesame seeds
Add the starter, flours, and water to a mixing bowl and mix together by hand for 10 minutes. Let the dough rest for 15 minutes, add the salt, and knead for another 15 minutes. Cover the bowl with a towel and rest for an hour.
Punch down (or just knead a little if yours, like mine, didn’t really rise) the dough for about 2 minutes, cover it with the towel again, and give it another 2-3 hours rest. Divide it into two loaves and place into bowls lined with cloths that have been dusted with flour. Place the bowls into the fridge for 90 minutes.
After the 90 minutes, take the bowls out of the fridge and leave them on the counter for an hour. (Giving your friend a 50-minute massage is optional at this point, but please wash your hands well afterwards if you do.) Preheat the oven to 500 and put the dough back in the fridge while the oven preheats and fills with steam, about 30 minutes or so.
In a microwave-proof container, mix the cornstarch with the additional water until blended, and then microwave for a minute until it turns glossy. Turn the loaves out onto greased baking sheets, slash the tops, and brush with the cornstarch mixture (or just kinda spoon it over the top if you’re like me and don’t own a pastry brush). Sprinkle sesame seeds liberally over the top of the bread, put the bread into the oven, and immediately reduce the temperature to 450. Bake for 30-35 minutes until golden brown and delicious.
–c
NOTES
The container of semolina flour I bought was 680 g. I dusted the proofing cloths with some of the leftover semolina, which worked better than using the bread flour last week.
I’m not really sure why the bread didn’t rise until it was in the oven. It still had a good texture when it was baked. I have so much to learn about different flours.
One of the recipes I read said you could proof the dough for up to 24 hours in the fridge (instead of the 90 minutes in – 60 minutes out – 30 minutes in method described above), and this supposedly builds the sour flavor more. I might try this next week, and may or may not write about it.